The smart way to fabricate the valve handles is to make them out of plastic using an injection-molding machine (actually, the smart way is just to buy them, but anyhow). However, as we don't necessarily do things the "smart" way around here and wood is rather difficult to melt, that method has been ruled out. Consequently, there are quite a few machining steps that have to gone through in order to make these individually. Getting the order of operations right is important because we might find ourselves 'machined into a corner' and unable to hold the parts before they are completed.
Starting with the foam blank cut to finished length in the lathe, I bored out the front and back interior profiles.

The front:

and the back:

Now, I want to put an outside taper on the back while the stock is still in the lathe. This is problematic as I will no longer be able to hold the back of the part in a chuck after I cut the taper. This calls for a stub or jig that fits the interior profile of the stock.
Drill and tap a hole in some aluminum round bar:


and then machine the tapped end to the correct diameter.


Now I can cut the taper.

All the operations on the lathe are done and I can move the part, securely fastened to the stub, over to the mill.


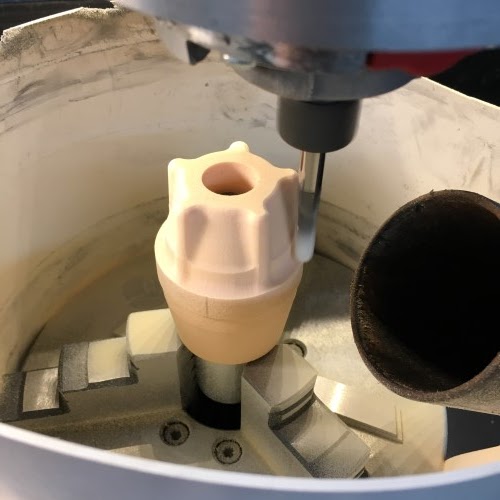
The milling program roughs out a perimeter to a certain depth and then refines the shape moving back upwards before stepping down to the next roughing level. The white rubber keeps the dust (mostly) within the range of the vacuum.

...down to the fourth roughing level.

... a few levels more and then I can take the part off the mill.

The threaded brass insert from the valve fits snugly in the foam version and will be glued in place for the finished parts.

I (heart) foam.

Starting with the foam blank cut to finished length in the lathe, I bored out the front and back interior profiles.

The front:

and the back:

Now, I want to put an outside taper on the back while the stock is still in the lathe. This is problematic as I will no longer be able to hold the back of the part in a chuck after I cut the taper. This calls for a stub or jig that fits the interior profile of the stock.
Drill and tap a hole in some aluminum round bar:


and then machine the tapped end to the correct diameter.


Now I can cut the taper.

All the operations on the lathe are done and I can move the part, securely fastened to the stub, over to the mill.


The milling program roughs out a perimeter to a certain depth and then refines the shape moving back upwards before stepping down to the next roughing level. The white rubber keeps the dust (mostly) within the range of the vacuum.

...down to the fourth roughing level.
... a few levels more and then I can take the part off the mill.

The threaded brass insert from the valve fits snugly in the foam version and will be glued in place for the finished parts.

I (heart) foam.

No comments:
Post a Comment